Replacement Screen and O-Ring Kit for Action Cam Housings ACC/SCH/AN/GP13

Replacement Screen and O-Ring Kit for Action Cam Housings

€40.16
Tax Excluded

Carbonarm housings for Action Cams are designed to be extremely robust and durable. To preserve their functionality over time, it is important to follow the instructions in the Maintenance and Lifetime Warranty section.

Carbonarm provides fast maintenance service worldwide and offers necessary spare parts, always ensuring full efficiency and long-lasting performance of your equipment.

During use, impacts or scratches may damage the housing screens, making replacement advisable. Keeping the screens in perfect condition is essential to:

  • Maintain maximum image clarity: high-quality plexiglass ensures faithful image reproduction even in low-light conditions
  • Ensure maximum reliability underwater: the included gasket guarantees perfect waterproofing up to the operational depth of -250 meters

If the screens are damaged, you can either send the housing to us for maintenance or replace the screens yourself; note: this operation is recommended only for those with good manual skills.

After replacement, it is mandatory to perform a test dive without a camera inside to verify full waterproofing.

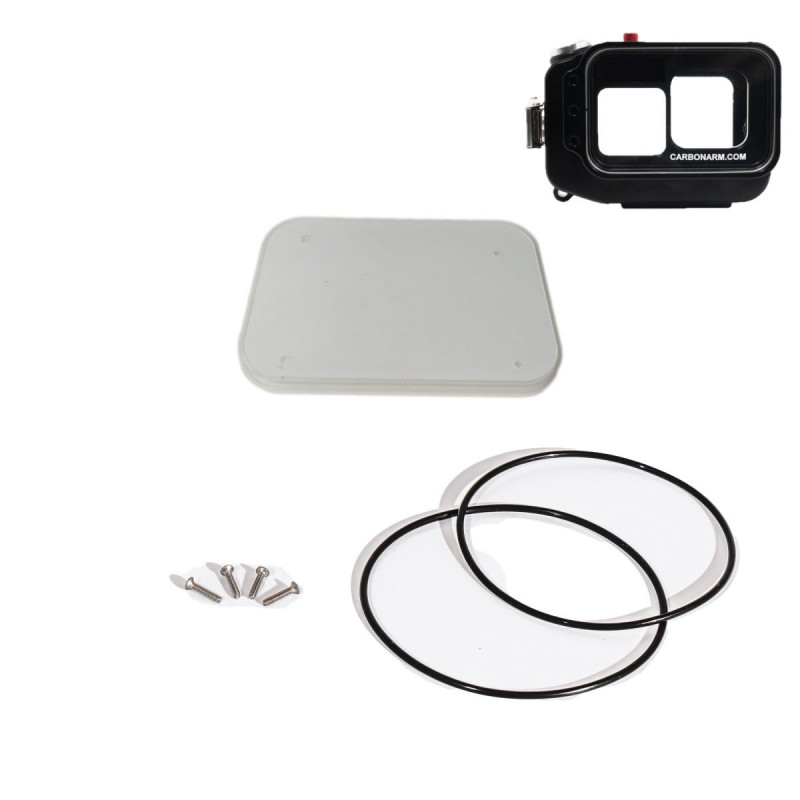
Both front and rear screen kits are available.

Kit contents:

  • Replacement screen with pre-installed o-ring
  • Sealing o-ring
  • 4 fixing screws

Kit available for Action Cam housings: GoPro, Insta 360 Ace Pro, and DJI Osmo Action

Screens


Instructions for correct replacement of screens/o-rings

1. Screen with pre-mounted o-ring:

  • Unscrew the 4 screws of the screen (front or rear, depending on the purchased kit) from the inside.
  • Remove the damaged screen.
  • Gently clean both mating surfaces with a clean, dry cloth, removing dirt, hair, or sand particles.
  • Apply light lubrication to the o-ring.
  • Secure the screen with the 4 supplied screws, without overtightening to avoid damaging the threads.

2. Seating o-ring:

  • Remove the damaged o-ring from its seat on the housing body (or back, depending on the kit).
  • Gently clean the seat with a clean, dry cloth, removing dirt, hair, or sand particles.
  • Apply light lubrication to the o-ring.
  • Install the new o-ring into the seat.

After replacement, it is mandatory to perform a test dive without a camera inside to verify full waterproofing.

Body
Plexiglass
Length
Width
Thickness
6 mm
Weight
25 g
ACC/SCH/AN/AP2
Product added to compare.

By using this website you consent to the use of cookies and third-party cookies. It is possible to view the » Privacy Policy page regarding the management methods of the same.